The tripod-and-clip method is great for one-time, sporadic, or travel projects. But for me, it's a regular thing: periodically, someone sends me a box of documents, or a journal or the like. Also, I shoot digitals of family documents, kids' artwork... anything I want to preserve in digital format. Here's a fairly inexpensive way to set up something more permanent.
Inexpensive Shooting Table
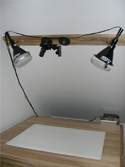
The basic idea is, mount a couple of lights and the camera above the table, so you don't have to mess with the tripod. I put the table under the eaves, upstairs, so the lights and camera are mounted at eye-level on a sloping ceiling, over the table. You could do the same thing on a flat ceiling, but you would need to rig up a post or something at a reasonable height above the table. Things You Need
- A digital camera
- A table, ideally under the eaves somewhere
- A couple of photo lights with plastic photo filters
- Mounting hardware for the lights
- A couple of iron pipe components, and black paint if you want to be fussy
- A clip-on camera mount
- A board to mount things on, and hardware to mount the board
Setting up the Shooting Table First, get the photo lights and hardware. I bought a couple of lights at Adorama Camera (an online photo supply store). Here's how my setup works: From the camera supply store, I bought two short fittings to mount the lights on. The lights have a clip that attaches to a ball-end of these little fittings.
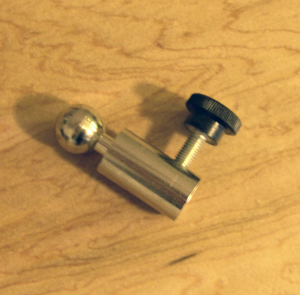
So the light connects to the fitting like this:
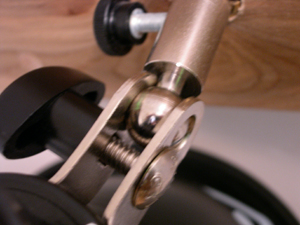
The other end of the fitting is designed to slide over a metal rod and tighten with the thumb-screw. So, I need a metal rod to come out from the mounting board, so I can attach the fitting to it. I bought two brass fittings at a hardware store, threaded inside and outside, and a short section of threaded metal rod. The outside threads of the brass fitting allow me to drill holes in the mounting board, and screw the fittings into the wood. Now I have a metal fitting mounted in the board, into which I can screw a short piece of threaded metal rod.

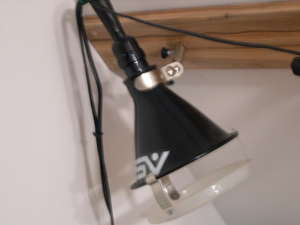
Slip the fitting onto the metal rod and tighten the thumb screw, and then mount the light on the fitting.
Next, I bought a camera mount that's designed to clip onto a heavy-duty tripod or mounting post. I want to mount the camera above the center of the table. So, I bought an iron flange and a short piece of threaded iron pipe at the hardware store. I painted them black, and put some electrical tape over the exposed threaded end, just to be neat. The flange is screwed into the mounting board, and the camera mount clips onto the pipe.
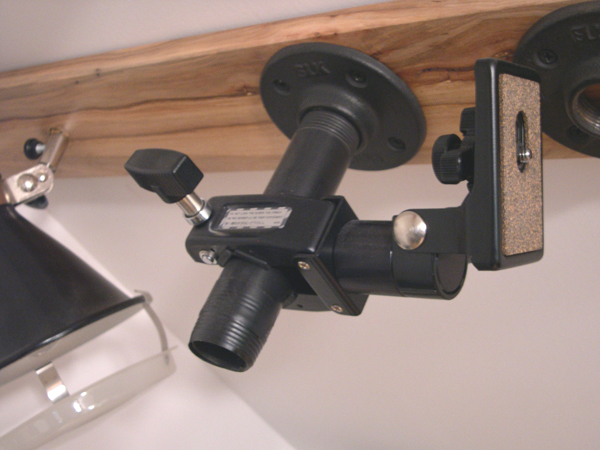
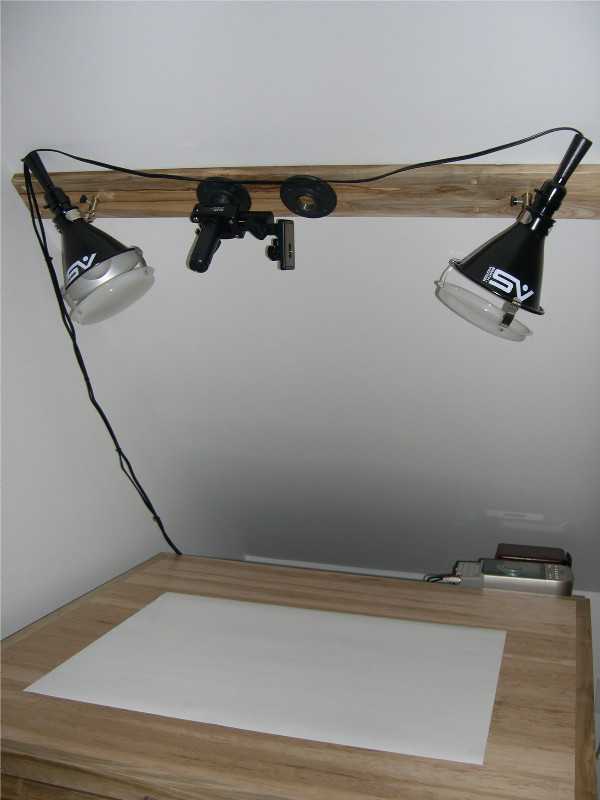
...And that's it. I have one extra flange for cases where I want to move the camera over, but basically, the camera is mounted directly overhead, and the lights light up the table. I use the same pencil-mark method for helping place the items on the table (see the previous page), so once I set up the camera (set the zoom, etc.), I can just fire away, page after page. Here's the full setup:
Next: Scanning photos.